Pokémon Decompression
What are you even talking about, Miya?
Well, my curious imaginary parasocial reader, let me answer you!
In Pokémon Red, Green, Blue and Yellow, also known as Generation I, memory and storage were limited due to the medium of the Game Boy being used. Having 151 Pokémon sprites for the front and back, tilesets for the environment and trainers, as well as the audio data for every music and sound effect and Pokémon cries was… too much.
Game Freak (the developers for Pokémon), had to compress the sprites for the Pokémon in order to reduce their size on the game’s ROM.
Ever since learning in details how the decompression of those sprites worked, I knew I wanted to try to write a decompressor myself.
So I did.
In Unreal Blueprints.
Let’s dive into it!
Algorithms Overview
Please, go check
both
videos
from Retro Game Mechanics Explained for more details on those algorithms. The quality is outstanding and the explanations extremely clear.
I’ll only cover the surface in with little details.
We’re going to read individual bits or groups of bits, no full bytes.
There are three big steps to the whole decompression: Decompression, Decoding, and the rest.
We start by reading some bits to get data such as the sprite size or the decompression type to use when reading.

Contextual Data gathered that gets used later in the process. For some reason, almost every Pokémon has Buffer C set as its primary buffer.
Then, we alternate between
directly copying data
(Data mode) and
interpreting data as binary numbers to add empty space
(Run Length Encoding). We repeat this for two different “Bitplanes”.
This is the whole decompression, but the Sprite looks wrong because it still needs to be decoded.
We decode two columns at a time, going down then right. Whenever colored dots appear, it’s because we copied Data directly. Long empty spaces are due to the RLE algorithm.
We decode in different modes depending on some bits that we read, using Delta Decoding and maybe some XORing of the Bitplanes together.
The sprite data has been encoded to maximize the number of white pixels and make the RLE algorithm more performant. Notice how the sprite on the right goes from blank to filled when decoding.
Then we do the rest, some data manipulation and computation specific to the Game Boy’s graphical pipeline that I omitted because I’m working in Unreal Engine and it’s outside of the scope of what I wanted to achieve.
The internal data and final results are visualized through a grid of planes, 12544 of them in fact, grouped through Instanced Static Meshes, and with their colour being modified in real time using Per-Instance Custom Data.
A 0 represents white (blank canvas) and a 1 represents black. Values in-between are used in the final result for greyscale.
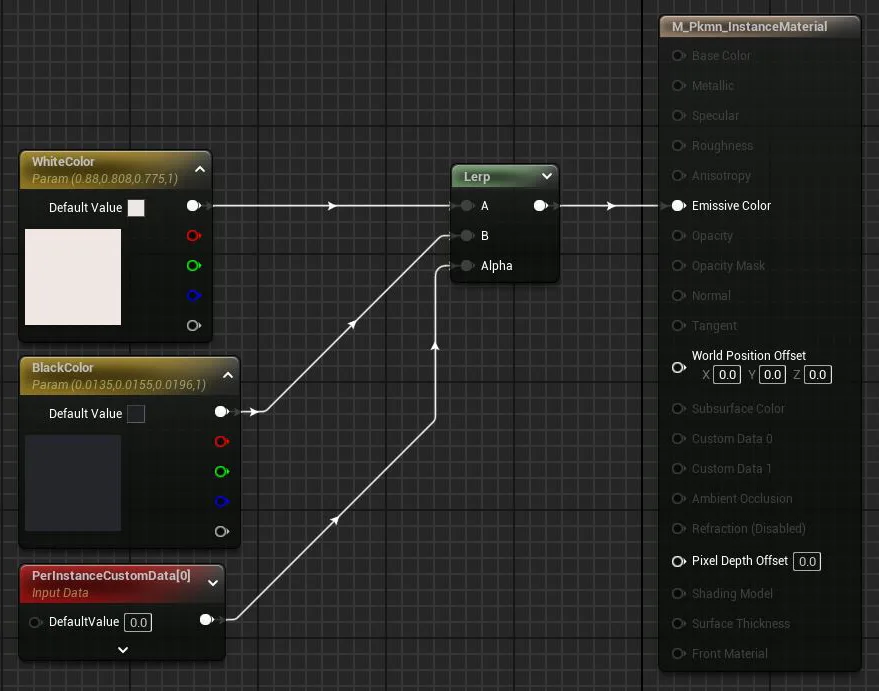
This isn’t the most riveting image, but it’s the first time I made use of Per-Instance Custom Data, and it’s better than no image.
Limitations & Simplifications
This is not a GBA emulator, and does not replace Retro Game Mechanics Explained’s web app that can be found here (still not sponsored).
For example, some parts of the algorithm such as placement of the sprite on the 7×7 canvas, the conversion from two 1-bit Bitplanes into one 2-bit Bitplane for usage on the Game Boy, or specific ordering during decompression weren’t recreated faithfully.
This has some side effects: Glitch sprites such as the famous MissingNo. don’t work, and during the decompression, sprites smaller than the full 7×7-tile size look more scrambled than in reality in the memory buffer (the end result is still correct).
I still tried to do everything using only one 9408-bit buffer, the same memory size that the Game Boy uses. I only could write and read using one Index Pointer at a time that had to be manipulated separately.
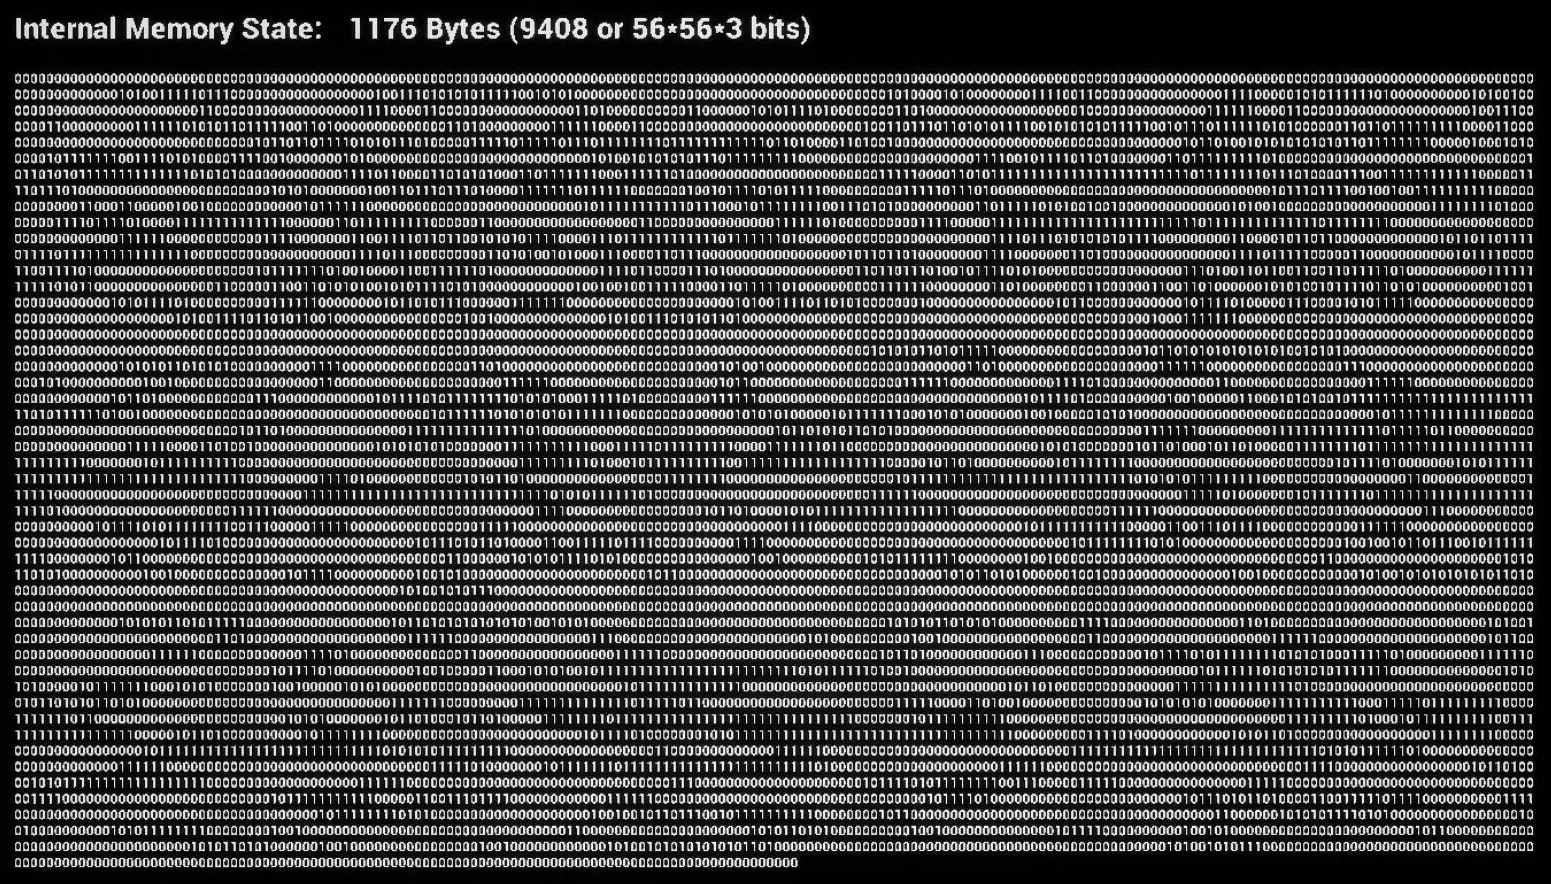
This is a textual representation of the pixels shown above. Only one individual bit can be changed at a time, using a “Index Pointer” variable that the decompressor kept track of, because I felt like challenging myself I guess…
I also used the same ordering for the visuals as the games: Pixels are ordered from up to down, then going left, but two columns at a time. Since everything works as pairs (pairs of Data or pairs of 0s), this was more accurate and brought more recognizable results.
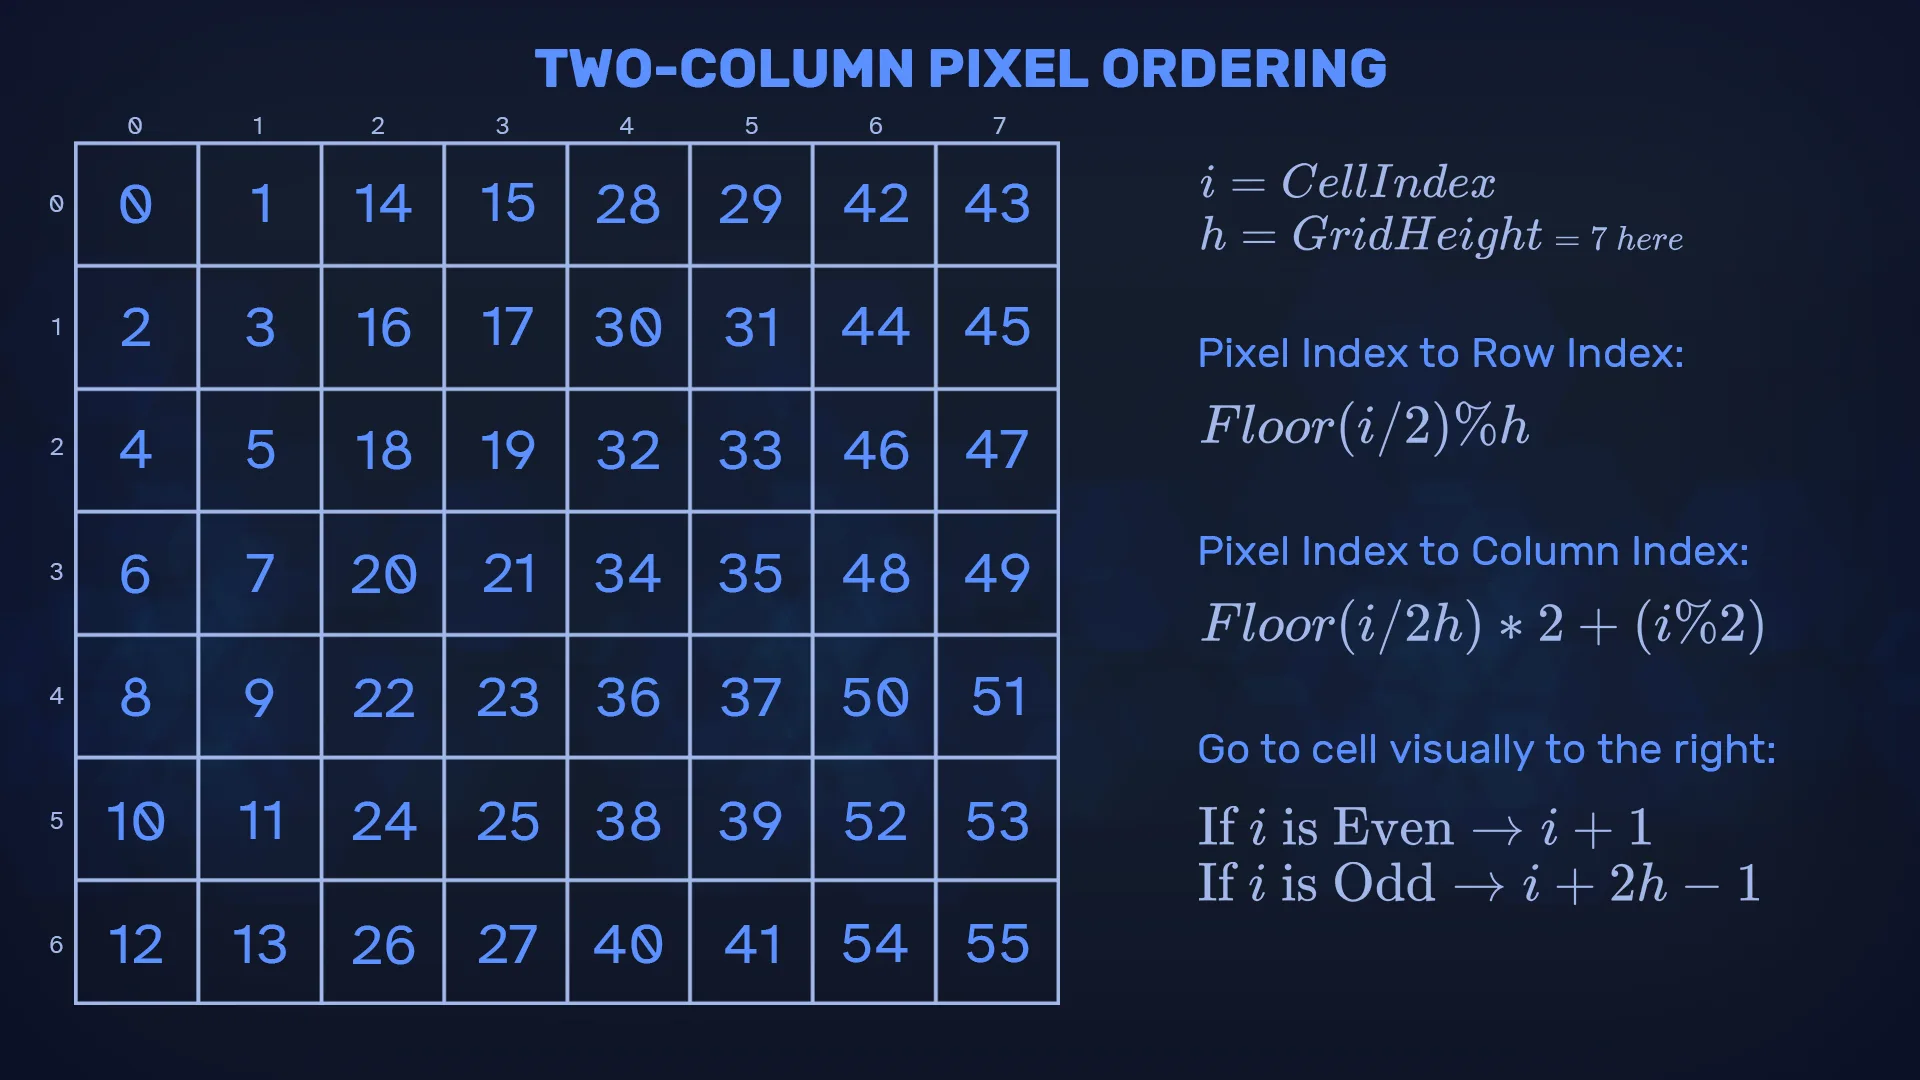
Before starting anything I had to figure out how to navigate in a Two-Column Pixel Ordering space, instead of the usual grid. I added a few formulas that were used quite a lot during development for moving around or getting basic info about a specific cell index.
Credits
Huge thanks to Retro Game Mechanics Explained’s two videos on the subjects, that introduced me to this concept. Also check out the associated online web app that emulated everything.
Also thanks to Hexed.it for helping extract the compressed data from a ROM of the game.