Spiritdancer
Spiritdancer is a proof-of-concept where you move around a city and can change your own mass at will. Low mass makes you hover in the air and jump super high, regular mass makes you run fast and allows bunny-hopping, and high mass makes you plummet to the ground but renders you incapable of sprinting nor jumping.
Switching between the three states—Ultra-Light, Default and Ultra-Heavy, changes your movement speed and camera movements, from floaty-and-bouncy steps to energetic running. The goal was to handle those state transitions smoothly.
TL;DR of the whole article: Unreal’s Interp nodes are really useful.
3Cs: Character
To have a different feel in between the three mass states, a big part of the changes are the camera movements (next big part of this article), but the other big part definitely are the Character Movement Parameters.
To get accurate metrics of the different modes’ abilities (jump height and length, running speed, etc), I built a small Metrics Gym to measure and quantify distances precisely. In a real game, those distances would then be used for the Level Design to ensure feasibility and readability.
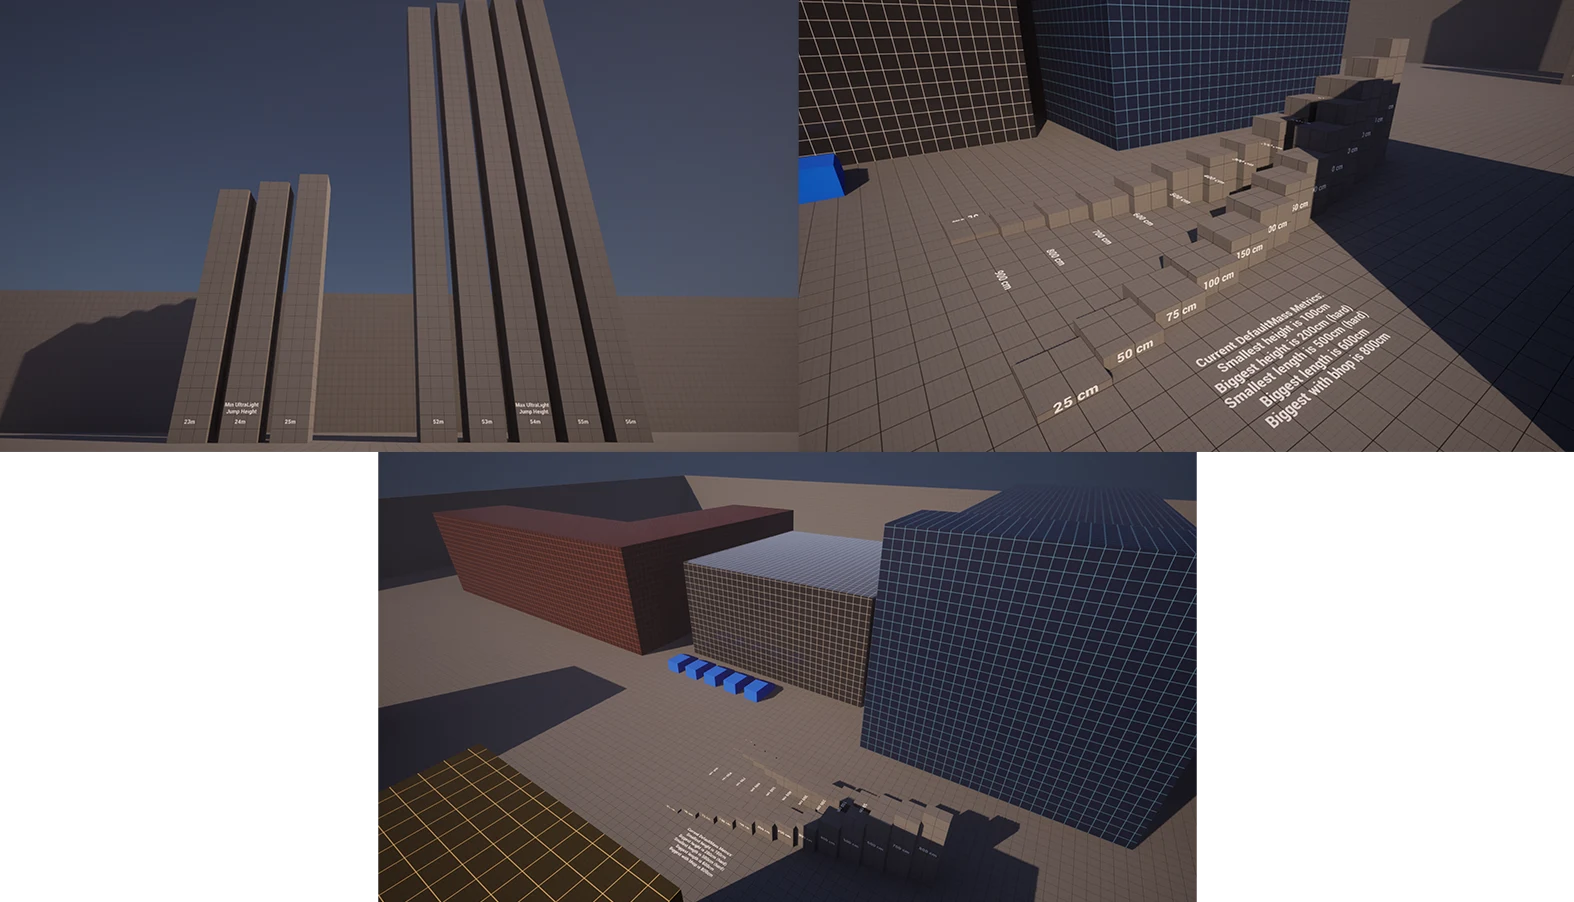
The Metrics Gym. Colored blocks are real-life buildings from Montpellier, scaled 1.25x, to get a realistic grasp on what those distances meant. Yes, I grabbed real measures through Google Maps to get accurate-ish values of ArtFX’s building (in black).
Three Data Assets (one per mass) exist, determining the values that are modified to make them all different: Walk speed and acceleration, time it takes to do one step forward, jump strength and air control, and obviously gravity strength.
Preview of the three mass walking forward.
To have an interesting jump and float sensation in Ultra-Light mode, I completely remove gravity and friction from the character in that state, to implement a custom solution.
Jump Z Velocity is set to a very high value (2500), Air Control is increased (0.85) and gravity is set to 0.
Vertical Friction doesn’t exist out of the box in Unreal, so I simply Interp the current velocity to make it approach -80cm/s. I use two different speeds for that interpolation: one when rising, and one when falling which is higher so that it feels more controlled.
Other methods such as following a velocity curve or trying to hard-code more values didn’t work with mid-jump mass switching. Interps on the other hand make everything feel smooth even if unrealistic.
Final result of the jump, notice how we slowly decelerate and come to a stop before stabilizing at a slow downwards pace.
If the Ultra-Light mode has its “hover”-like movements to make it unique, the Default mass has Bunny Hop. On top of the classic Coyote Time and Jump Buffering techniques to make it feel good, there is a “Bunny Hop” mechanic that artificially makes the player faster as long as they keep jumping.
If the player switches mass, or doesn’t jump within 0.35s of landing on the ground, the speed disappears. If they chain jumps though, each consecutive jump increases their max speed until a cap is reached.
Debug View of the character, notice the “Current Bunny Hopping Speed” parameter get bigger and bigger as I chain jumps. You get up to +600cm/s movement speed on top of the regular 850cm/s. That’s a 70% bonus!!
3Cs: Camera
To get a convincing (even if unrealistic!) camera movement, I decided to analyze camera movements from Mirror’s Edge to learn from their work.
There were three key takeaways: camera movement is synchronized to each step, there is both rotation and translation applied on this rhythm, and movements will NOT reflect reality because reality is chaotic and blurry and that doesn’t look good in first-person.
Running cycle at Default Mass. I could have done slightly faster steps but it quickly looks cartoonish and ruins the flow of the movements.
To avoid many problems due to starting and stopping to run, jumps, and mass switching, there is a continuous counter flipping from Left to Right determining the current step the character is taking, even if not moving.
The camera movements adapt to this left-right pattern and slowly fade-in when movement starts. Previous tries attempted to do specific math on contact and on apex of each step but that was very difficult to maintain and didn’t feel good with
Switching mass is handled naturally by Interps that apply the camera movements, so no specific code is needed.
Switching from Default to Ultra-Light mid-run, the run becomes floatier but the transition is smooth.
Custom curves are used to Rotate and Translate the Camera depending on the Step Cycle. This simulates up-down and left-right movements that the head would do.
Over the course of a step, the camera Rolls from one side to the other, and rotates up then back horizontally.
For translations, the camera rises and drops with a sudden bounce back after a step, not directly on a step, to simulate some kind of follow-through of the head which feels better; and also moves from side to side.
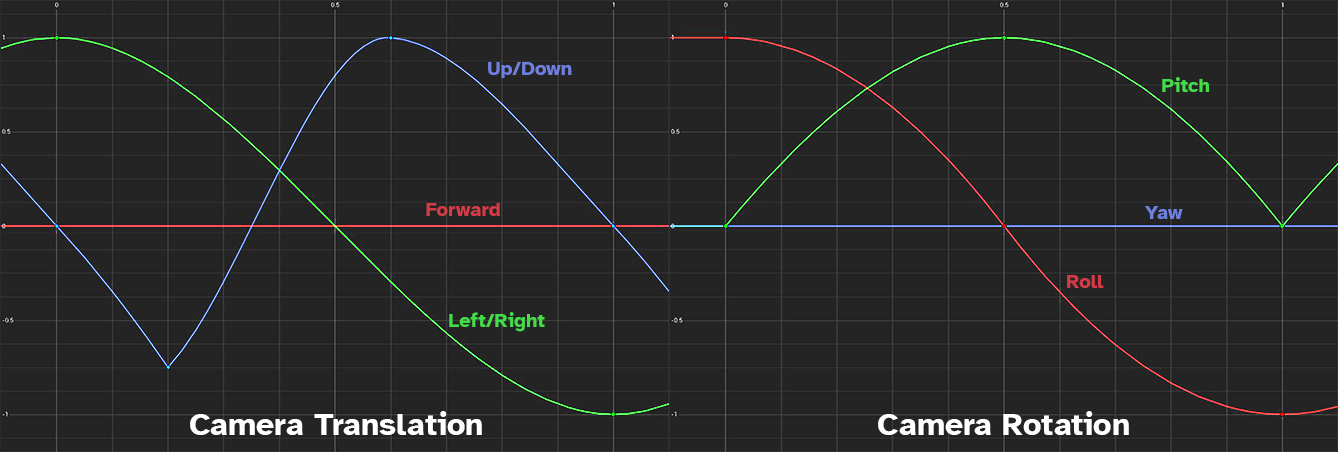
Left is the curve for camera Rotations along three axes, and right is the camera Translation. One axis is always fixed to avoid wobbly nauseating feelings. Curves are normalized so they go from -1 to 1 but each axis is scaled independently.
More interesting results could have been gotten by using different Curves for each mass state (not just different intensity and speed). But then switching from one to another would have been harder to make smooth on-the-fly.
Cars and Nodes
An important part of every project is to have a secondary system or mechanic that serves little purpose but that you still take the time to make for the fun of it.
Not.
But I still had one.
In Spiritdancer, this is the Car and Road system.
It’s a very simple system: dotted around the map are roads made with a black material (cosmetic only, they aren’t used in the code) and at each junction a Car Node is placed to tell what directions are allowed.
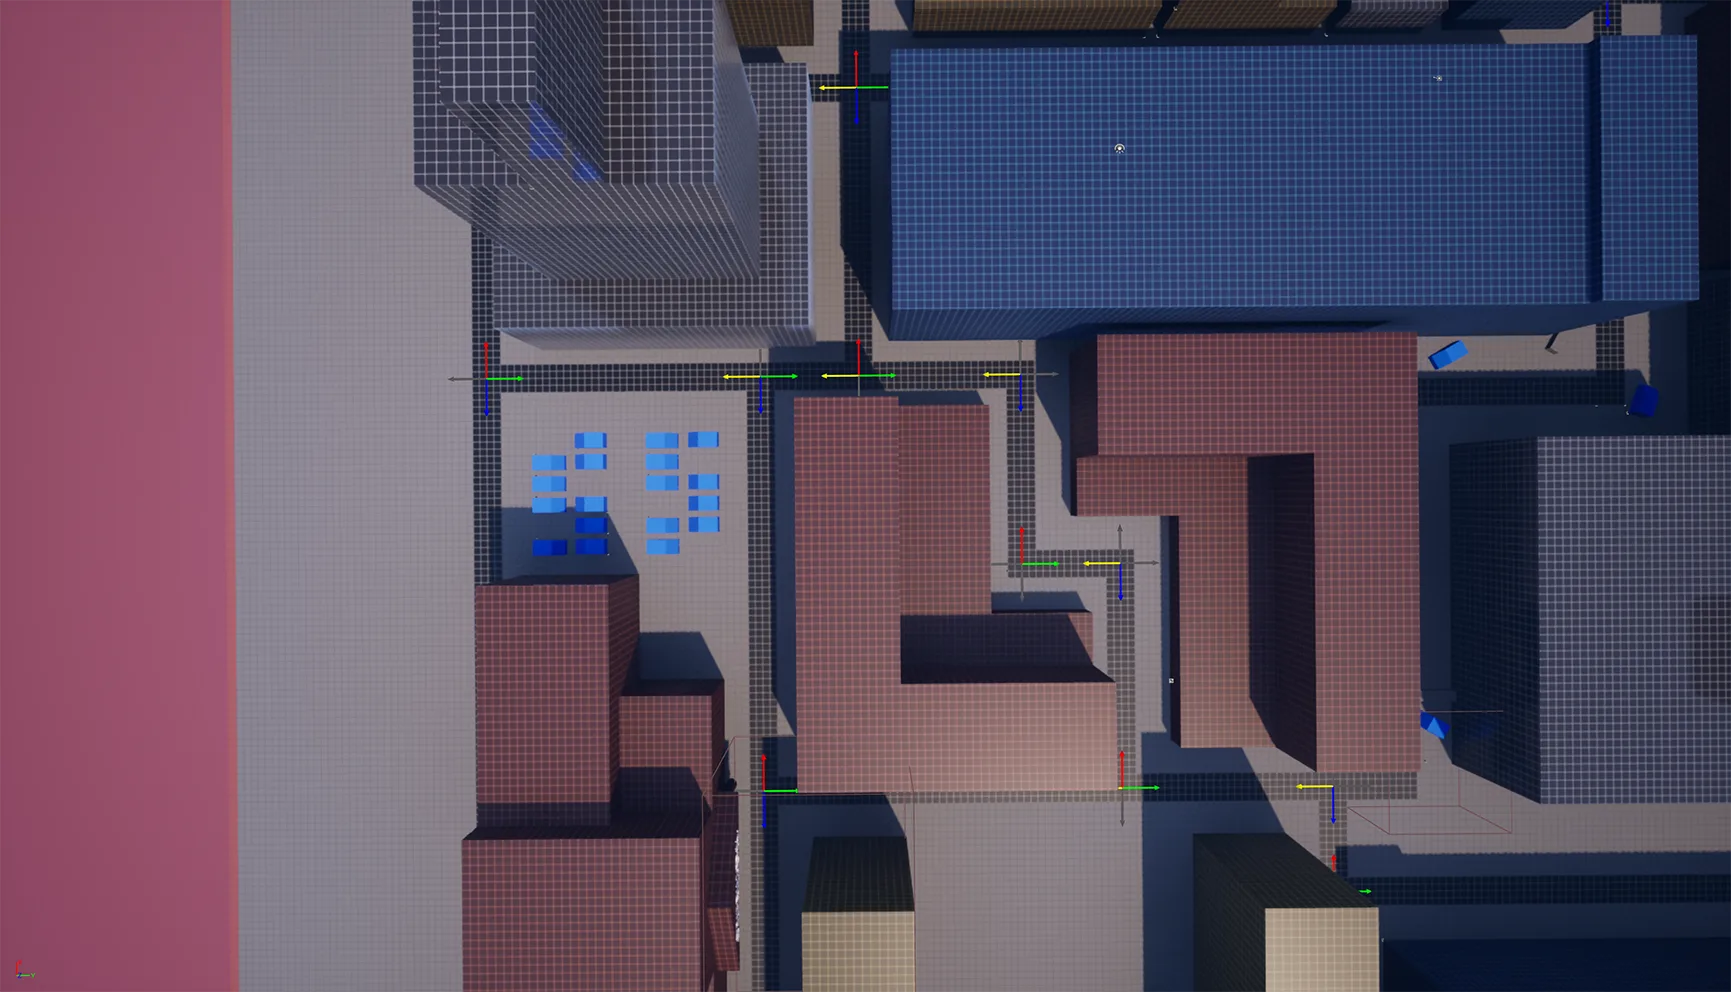
Bird’s-eye view of a section of the city. Car Nodes are visible with their arrows being colored if the path is clear, grey otherwise.
Cars move forward and detect Car Nodes on their path. They select a random valid direction (that is not where they came from to avoid u-turns) and rotate towards that direction, moving forward until the next Car Node.
It’s a pretty simple system, Cars can phase into each other, a misplaced node makes cars move forward forever, and there is only one lane; but it does the job of adding some life in the city!
Bird’s-eye view of cars moving using the Nodes scattered throughout.
